OpenFilm is an open-source AI video agent that allows your Claude Code, Codex, and other coding agents to create videos from natural language.
The agent builds a film from animated web pages, footage, images, and audio. OpenFilm Studio shows the work as it develops in a local video editor with a viewer and timeline.
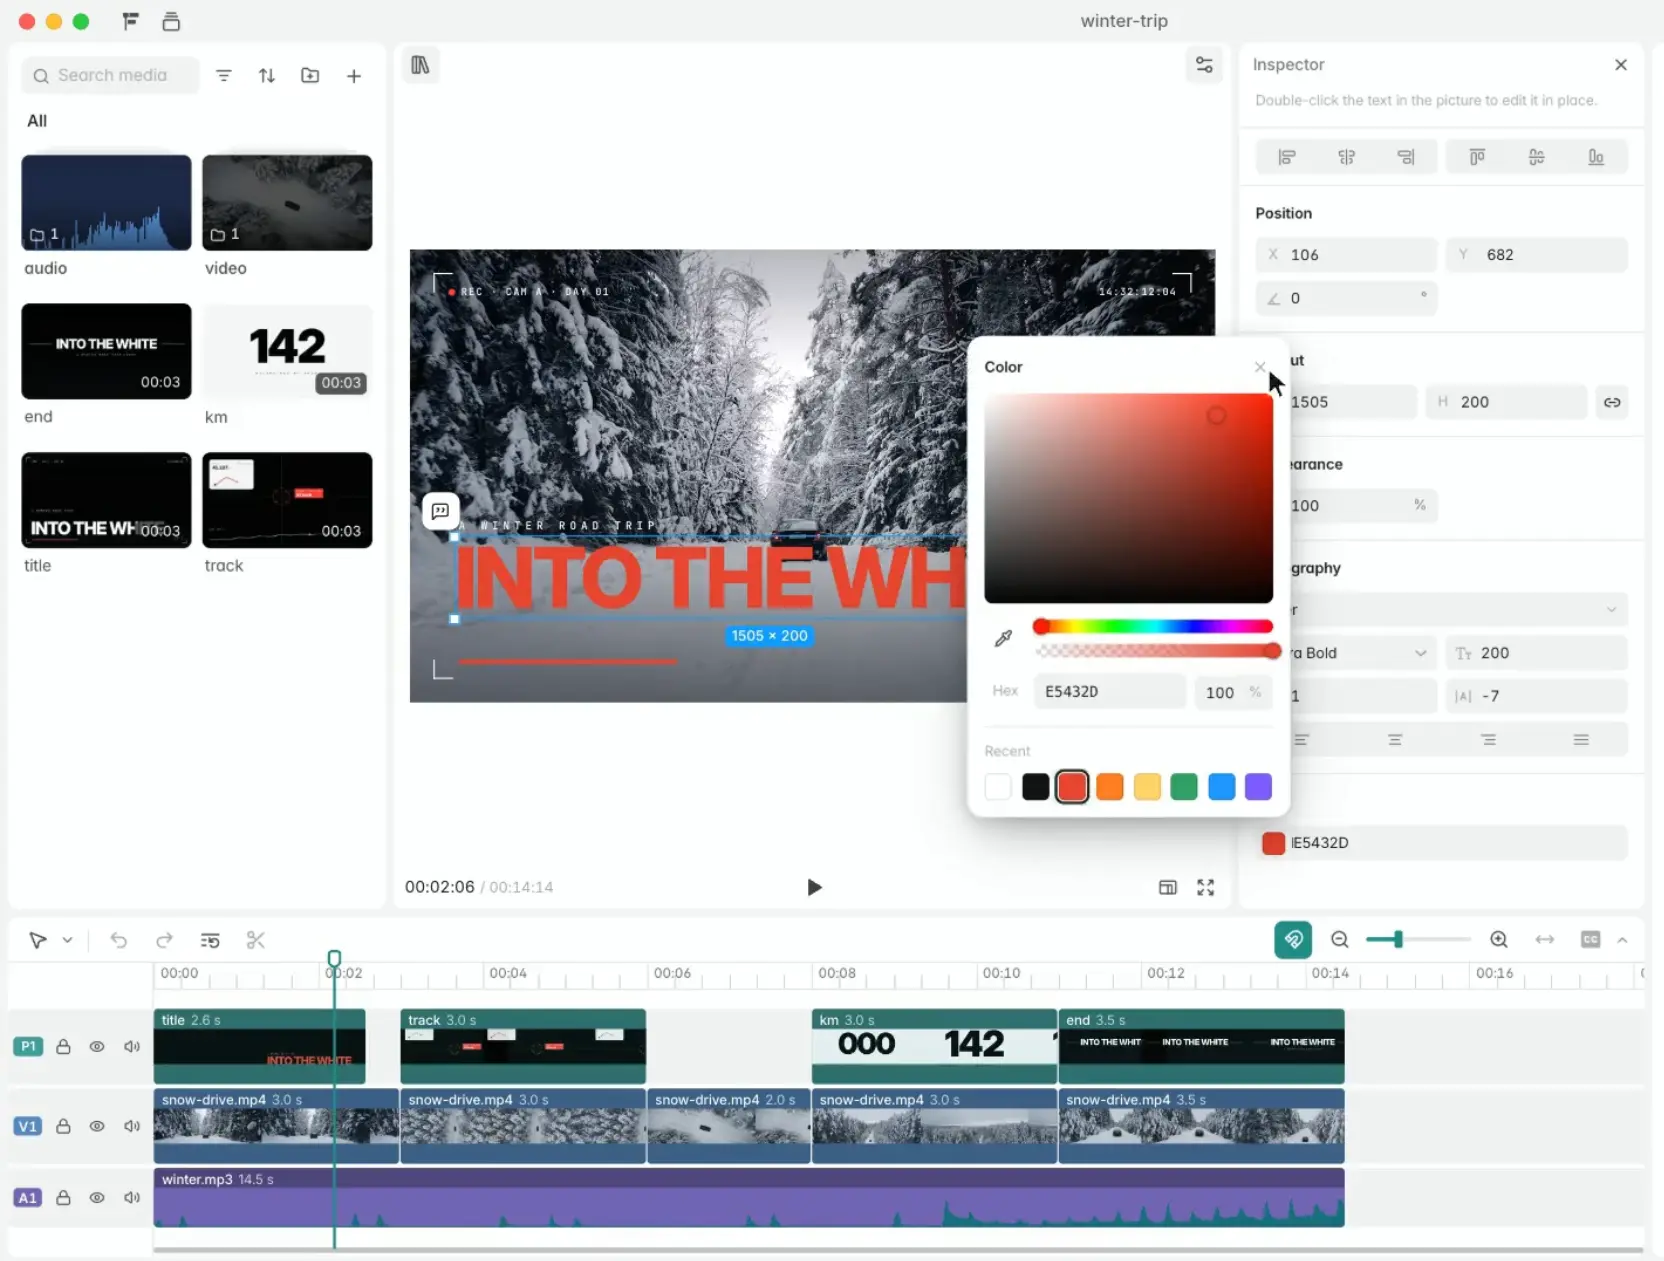
You can change the first cut directly in Studio: move a title, trim footage, adjust a color, or rearrange clips. The coding agent reads those edits from the film’s project files and can continue revising the video.
Key Features
- Turn a written brief and supplied media into an editable video with Claude Code, Codex, or another command-capable agent.
- Animate scenes using HTML, CSS, SVG, Canvas, WebGL, Three.js, or GSAP.
- Edit on-screen elements, clip timing, audio, and subtitles in a local video editor.
- Organize references and create media on a visual Canvas that can also display storyboards.
- Add music, sound effects, transitions, and templates from OpenFilm’s free asset library.
- Generate speech, music, images, and video through connected AI services.
- Inspect individual frames and export MP4 video at resolutions up to 4K.
- Export GIFs, transparent video, audio stems, subtitles, and timelines for other video editors.
How OpenFilm Makes a Video
A film is a folder containing film.html and the media used in the edit. The film.html file arranges clips across tracks and defines when they appear, how long they play, and where they sit in the frame. Animated shots can live in their own HTML pages alongside imported videos, images, narration, and music.
For a product launch, you could give Claude Code or Codex a logo, screen recording, and short brief. It can build animated titles, add the recording and a music track, and open the assembled film in Studio. Changes appear as the agent saves the project files.
Animate Shots with Web Technologies
Each HTML scene exposes a window.film.frame(t) function that draws the scene at a requested time in seconds. You can use CSS, SVG, Canvas, WebGL, and ordinary JavaScript to create animation.
A simple title fade could look like this:
<h1 id="caption">Launch day</h1>
<script type="module">
window.film = {
  duration: 4,
  frame(t) {
    document.querySelector('#caption').style.opacity =
      String(Math.min(1, Math.max(0, t)));
  }
};
</script>
Edit the Film in OpenFilm Studio
OpenFilm Studio runs locally in a Chromium-based browser such as Chrome or Edge. The Viewer displays the current frame, the Layers panel exposes elements in the scene, and the timeline arranges video and audio clips.
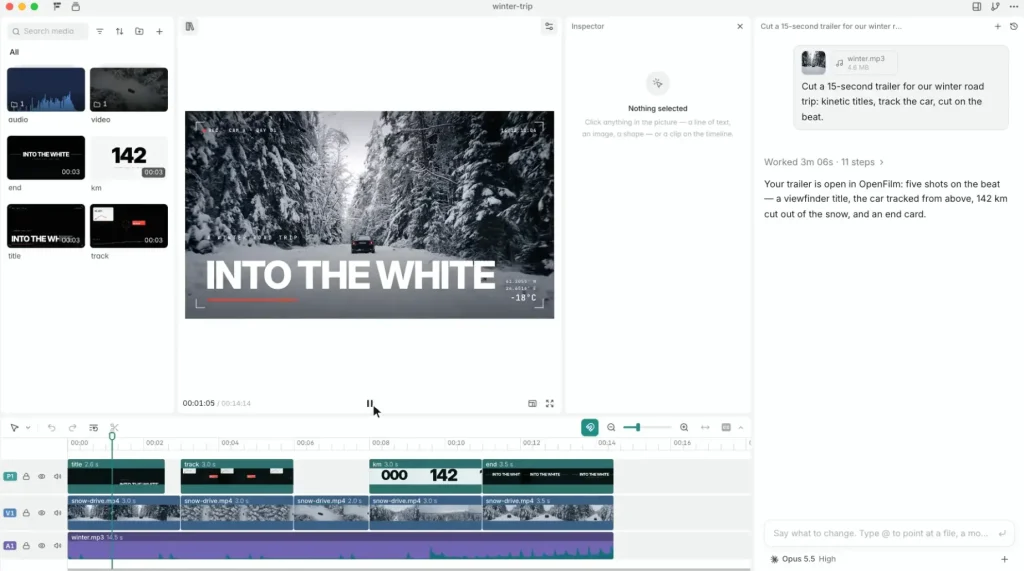
Click an element to move, resize, rotate, or restyle it. Double-click text to edit the wording. On the timeline, drag clips into place, trim their edges, or split them at the playhead.
The Studio saves these changes to film.html. For edits inside an HTML scene, it records element overrides on the relevant clip. The original scene code stays available, and the agent sees the overrides when it resumes work. You could fix a headline visually, ask the agent for a new outro, and continue editing the revised cut in Studio.
Plan Shots and Generate Media on the Canvas
The Canvas is a visual board beside the edit. Place notes, reference images, footage, narration, and music on it, connect them to media-generation steps, and send completed assets to the timeline. A film can contain several canvases, each viewable as a storyboard.
For example, you could arrange three reference images for a product sequence, generate an additional shot using a connected service, and add narration before placing the assets in the edit.
The Assets drawer supplies music, sound effects, text treatments, stickers, effects, transitions, and templates from OpenFilm’s free library. You can preview these assets and insert them into the film.
Videos You Can Create with OpenFilm
- Product demos: Combine your own screen recordings with animated headings, branded graphics, and a music track to produce a short launch video.
- Technical explainers: Animate a diagram, chart, or process in HTML or SVG and synchronize it with narration and labels.
- Interview edits: Arrange recorded clips, cut sections on the timeline, add subtitles, and introduce supporting images or footage.
- Social video versions: Reframe imported footage, change title placement, and export vertical or widescreen cuts from a film project.
How to Install and Use OpenFilm
OpenFilm offers a command-line tool for macOS, Windows, and Linux, plus a desktop app for macOS and Windows.
The CLI requires Node.js 22.2 or later and FFmpeg. Git is used for Studio’s saved versions, and the first CLI run downloads a headless Chromium build of about 100 MB.
The desktop app includes Studio, a chat panel for installed coding agents, FFmpeg, and the headless rendering browser. It can use agents such as Claude Code or Codex installed on your machine, or an agent configured with your own model API key.
Make Your First Video with a Coding Agent
If your coding agent supports agent skills, install OpenFilm’s skill:
npx skills add openfilm/openfilmOpen your coding agent in a folder containing the media you want to use. Give it a video brief such as:
Make a 20-second launch video for my command-line app. Use the logo and screen recording in this folder, add animated titles, and include music.
The agent creates the film files and opens Studio as it works. Inspect the first cut in the timeline, change an element in the viewer, or request another edit in your agent chat.
You can open the current film in Studio and render an MP4 from its folder using:
npx -y openfilm@latest open
npx -y openfilm@latest render
OpenFilm CLI Quick Reference
Install the CLI globally with npm i -g openfilm if you want to use the shorter commands below. For a one-off command, substitute npx -y openfilm@latest for openfilm.
| Task | Command |
|---|---|
| Read the agent manual | openfilm |
| Open a film or import one from GitHub | openfilm open [folder | url] |
| Inspect a frame or contact sheet | openfilm look [what] [t | a-b] |
| Render an MP4 or a selected range | openfilm render [a-b] |
| Find or generate media | openfilm get [what] |
| Read or apply Canvas operations | openfilm canvas [apply <steps>] |
| List installed and available skills | openfilm skills |
| Read the instructions for one skill | openfilm skill <name> |
| Check the local installation | openfilm doctor |
Check and Export Your Video
Run openfilm look to generate a contact sheet, inspect a chosen frame, or check a time range. It checks repeated renders for inconsistent frames and reports issues such as missing fonts, unavailable audio, and text extending outside the picture.
openfilm render exports an MP4 beside film.html, using the folder name for the output file. The render options include --4k for 3840-pixel width, --fps 60 for a higher frame rate, and --blur for motion blur. To render a transparent video, use --alpha with --out pointing to a .webm or .mov file.
Studio can also export GIFs, still frames, slides, subtitles, complete audio tracks, and individual audio stems. It supports timeline export for Final Cut Pro, Adobe Premiere Pro, and DaVinci Resolve when you want to continue editing in another application.
Pricing and AI Services
OpenFilm is MIT-licensed, and its CLI, Studio, editing, and local rendering are 100% free. The built-in media library is also free to use in OpenFilm projects.
The coding agent uses your existing subscription or API account, such as a Claude plan for Claude Code or a ChatGPT plan for Codex.
In Studio -> Settings -> Services, connect media providers with your own keys to make speech, images, music, sound effects, transcripts, or video.
Privacy and Local Files
Your film, footage, editor settings, and local previews stay on your computer. Editing and rendering do not upload project files to OpenFilm.
AI requests follow the service you select. Your coding agent and any provider connected with your own key process the prompts or media you submit under their own terms.
Pros
- Lets a coding agent and a visual editor revise the same video project.
- Uses editable HTML scenes alongside recorded and generated media.
- Offers free local editing, rendering, and built-in assets.
- Exports formats for publishing and further editing in professional video editors.
Cons
- The CLI installation needs Node.js, FFmpeg, and a command-capable coding agent for AI-directed production.
- Generated footage, narration, and other AI media can incur provider or credit charges.
- The packaged desktop app is currently available for macOS and Windows. Linux users run Studio through the CLI and a browser.
Alternatives & Related Resources
- Screenplay: Free AI Agent Screen Recorder for Web and Desktop
- Mortiflix: Open-Source Local AI Video Generator with Claude
- OpenMontage: Open-Source AI Video Production System
- LTX-Desktop: Free Local AI Video Editor
- 10 Best AI Video Editors for Quick Professional Videos