LM Studio is a Mac & Microsoft app that allows you to easily discover, download, and run local LLMs on your own device.
It enables users to run LLMs without the need for an internet connection. Whether you’re a developer testing a model or a student exploring AI, this offline feature ensures uninterrupted access.
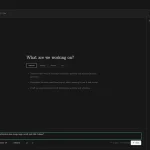
Once installed, you can chat with LLMs through the built-in interface or integrate them into your own apps and workflows via the local API.
Moreover, sourcing models is hassle-free. Instead of scouting the web, users can directly download any compatible model files from the esteemed HuggingFace repositories. Popular models like GPT-3.5 Turbo, LlamaCoder, and Nous are fully supported.
How to use it
1. Visit LM Studio AI.
2. Once on the site, choose the version compatible with your device, either Mac or Windows, and initiate the download.
3. Browse the catalog of available LLMs and download your model of choice.
4. Manage and update your LLMs easily within the LM Studio app.
How to download compatible model files from Hugging Face
LM Studio can run any Llama, MPT, or StarCoder/WizardCoder models on your CPU (all models) and GPU (llama only at the moment).
- Click the Search tab on the left hand sidebar
- Search for terms such as
wizardlm ggmlormpt 7b ggmlor justTheBloke ggml. (Rule of thumb: addggmlto your query) - Pick a “quantization” (
q4_0,4_K_M, etc.) which essentially means compressions level (Rule of thumb: the lower the number, the smaller and faster the model) - Download and run the model.
Which configuration parameters should I choose?
If you’ve played with OpenAI API or even llama.cpp yourself, you are likely familiar with parameters such as Temperature, Top P, Context Length, and more. You’re also likely aware that different models expect different prompt formats (### Instruction vs Human: and other variations). When it comes to adjusting such parameters you can either use the GUI, or a drag-and-drop a JSON configuration file. For initial experimentation, it’s recommended to stick to the default parameters. When you have something working, then start experimenting with new values.
Adjusting configuration parameters
- Click the tab on the app sidebar
- Take a look at the right-hand bar. You’ll see
Configurationat the top, with various subcategories:
- Inference Parameters : parameters that control various aspects of the model’s output, such as the number of words to generate (
-1means let the model stop on its own), and output randomness (Temperature) - Input Prefix and Suffix: this allows you to add text before and after user messages
- Pre-prompt / System prompt: text to add at the very top of a given conversation. Useful for in-context examples, CoT, and more.
- Model Initialization: configuration options that affect the way the model is loaded and initialized. You can change these before you load a model. This is where you could set the
Context Length - Hardware Settings: Choose the number of CPU threads and select whether or not to use the GPU.
- If you’ve found a configuration that works well for you, you can export it to file using the
Export Configbutton. - To load such exported configuration file, simply drag and drop it into the settings side bar. You’ll get an alert saying whether the load succeeded or failed.
Which model size should I choose? (7B, 13B, 15B, 30B, etc.)
Rough rules of thumb for getting practical generation speeds:
- 8GB RAM => choose 7B models or smaller.
- 16GB RAM => choose 7B, 13B models or smaller.
- 32GB RAM => choose 7B, 13B, 15B, 30B models or smaller.
- 64GB RAM => (?) max 7B, 13B, 15B, 30B models or smaller. You might be able to go higher than that.
- 96GB RAM+ => any model size should work for you.